Experimaker is currently in open beta, following an open access model. This means that some essential features are missing. And some features that are present may be unpolished.
Updates will happen regularly. Experimaker will constantly be improving over the next several months. It’s exciting!
Saving
Today’s update is a crucial step into turning Experimaker into a production-ready experiment platform. We’ve fixed a number of issues with saved results. Now, every participant who takes an experiment is assigned a unique subject ID. And participant responses are logged correctly. Finally, our manual response time feature works properly. Now, you can choose when you’d like your RT timer to start – rather than the default 0ms. As a reminder, you can access this feature from the Timeline tab, as seen in the image on the right.
Publishing
It’d be pretty awful if we allowed participants to take your studies while there were issues with saved results. So, up till now, we’d disabled publishing entirely. And, really, what’s the point of an experiment builder that can’t accept participants?!
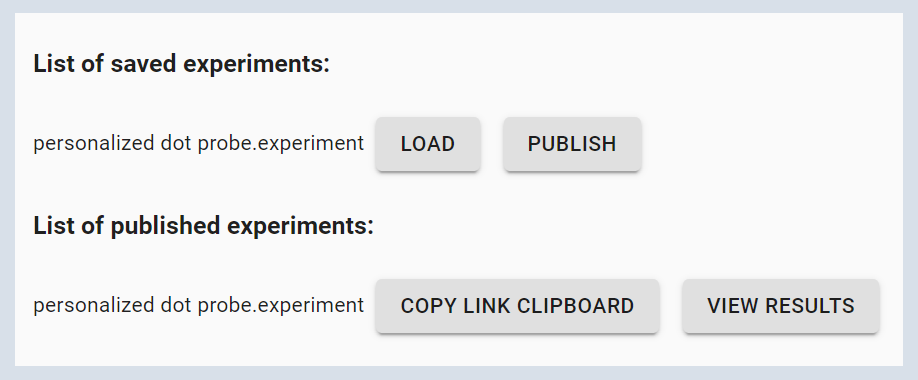
So we’re thrilled to announce that publishing is finally working and ready to go. We’ll have a tutorial video on publishing up and running soon, but here are the basics. You’ll need to be logged in to publish an experiment. So if you haven’t signed up yet, now’s the perfect time. Now that you’re logged in, go to the User Account screen. The link to the User Account Screen can be found in the footer, as shown below.


If you haven’t already, save the experiment you want to publish. You can only publish experiments which have been saved.
Click the publish button. And voilà, you’ve got a published experiment! Click on the “Copy Link Clipboard” button, and the experiment URL will be copied to the clipboard.
You can also view your results, or download them in csv format.
Dot Probe Task Template
Finally, our template of the week is the Dot Probe Task! Like many of the classic experiments we’ve featured so far, the dot probe task is designed to test our attentional biases. Two images are shown side by side. One is threatening, while the other is not. Then, the images disappear, and a dot appears behind one of the images. Participants have been shown to respond more quickly when the dot is found behind a threatening image. This is because people show greater vigilance in the face of potential threats.
Leave A Comment